Access Amazon Web Services in R
Build Your City in the Cloud
Recently I’ve been using several of Amazon’s Web Services for computing, storage, and turning text into voice and the experience has been great! With AWS you can easily rent a super-computer or archive some of the huge files you have laying around. Many of these services are accessible through a series of R packages written by Thomas Leeper and his colleagues as part of the Cloudyr project. Their packages are well designed and easy to use, however the initial setup of configuring AWS credentials can be confusing for folks who have never used AWS before.
So let’s get started setting you up with Amazon Web Services. First you’ll need to log into your Amazon account by signing into https://aws.amazon.com/. If you already have an Amazon account that you use to buy daily necessities then you can log in with that account. After providing some basic information you should see the AWS Console. This page has a search bar that looks like this:

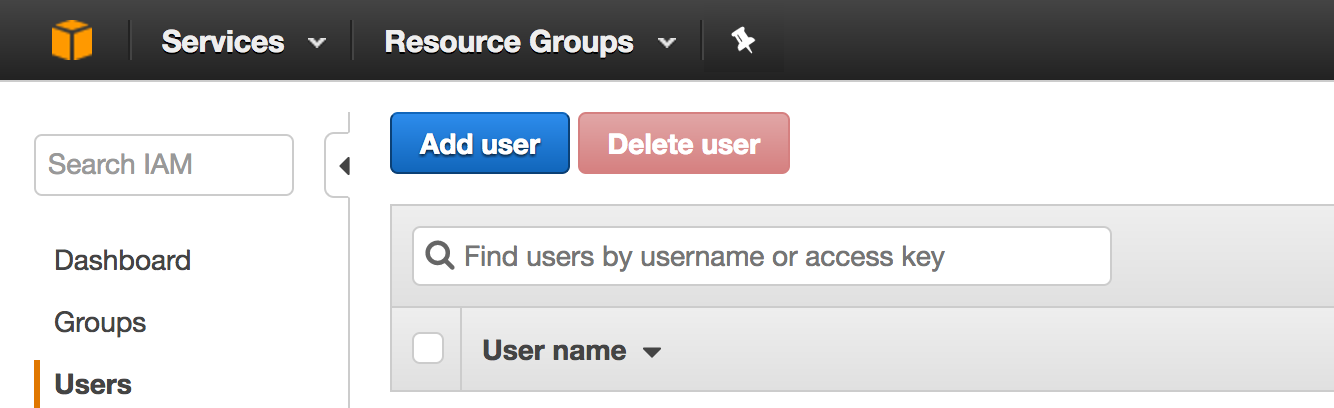
Type “IAM” into the search bar and click on the first result, Amazon’s Identity and Access Management system. On the left side of the IAM dashboard you should see a menu item called “Users”

Click on “Users” and then you should see yet another dashboard which will list the users you create. If you’re new to AWS then you shouldn’t see any user names listed! Click on the blue “Add user” button to create a new user:
In the user name field just enter a name that you can easily remember, and make sure to check the check box to give this user programmatic access:
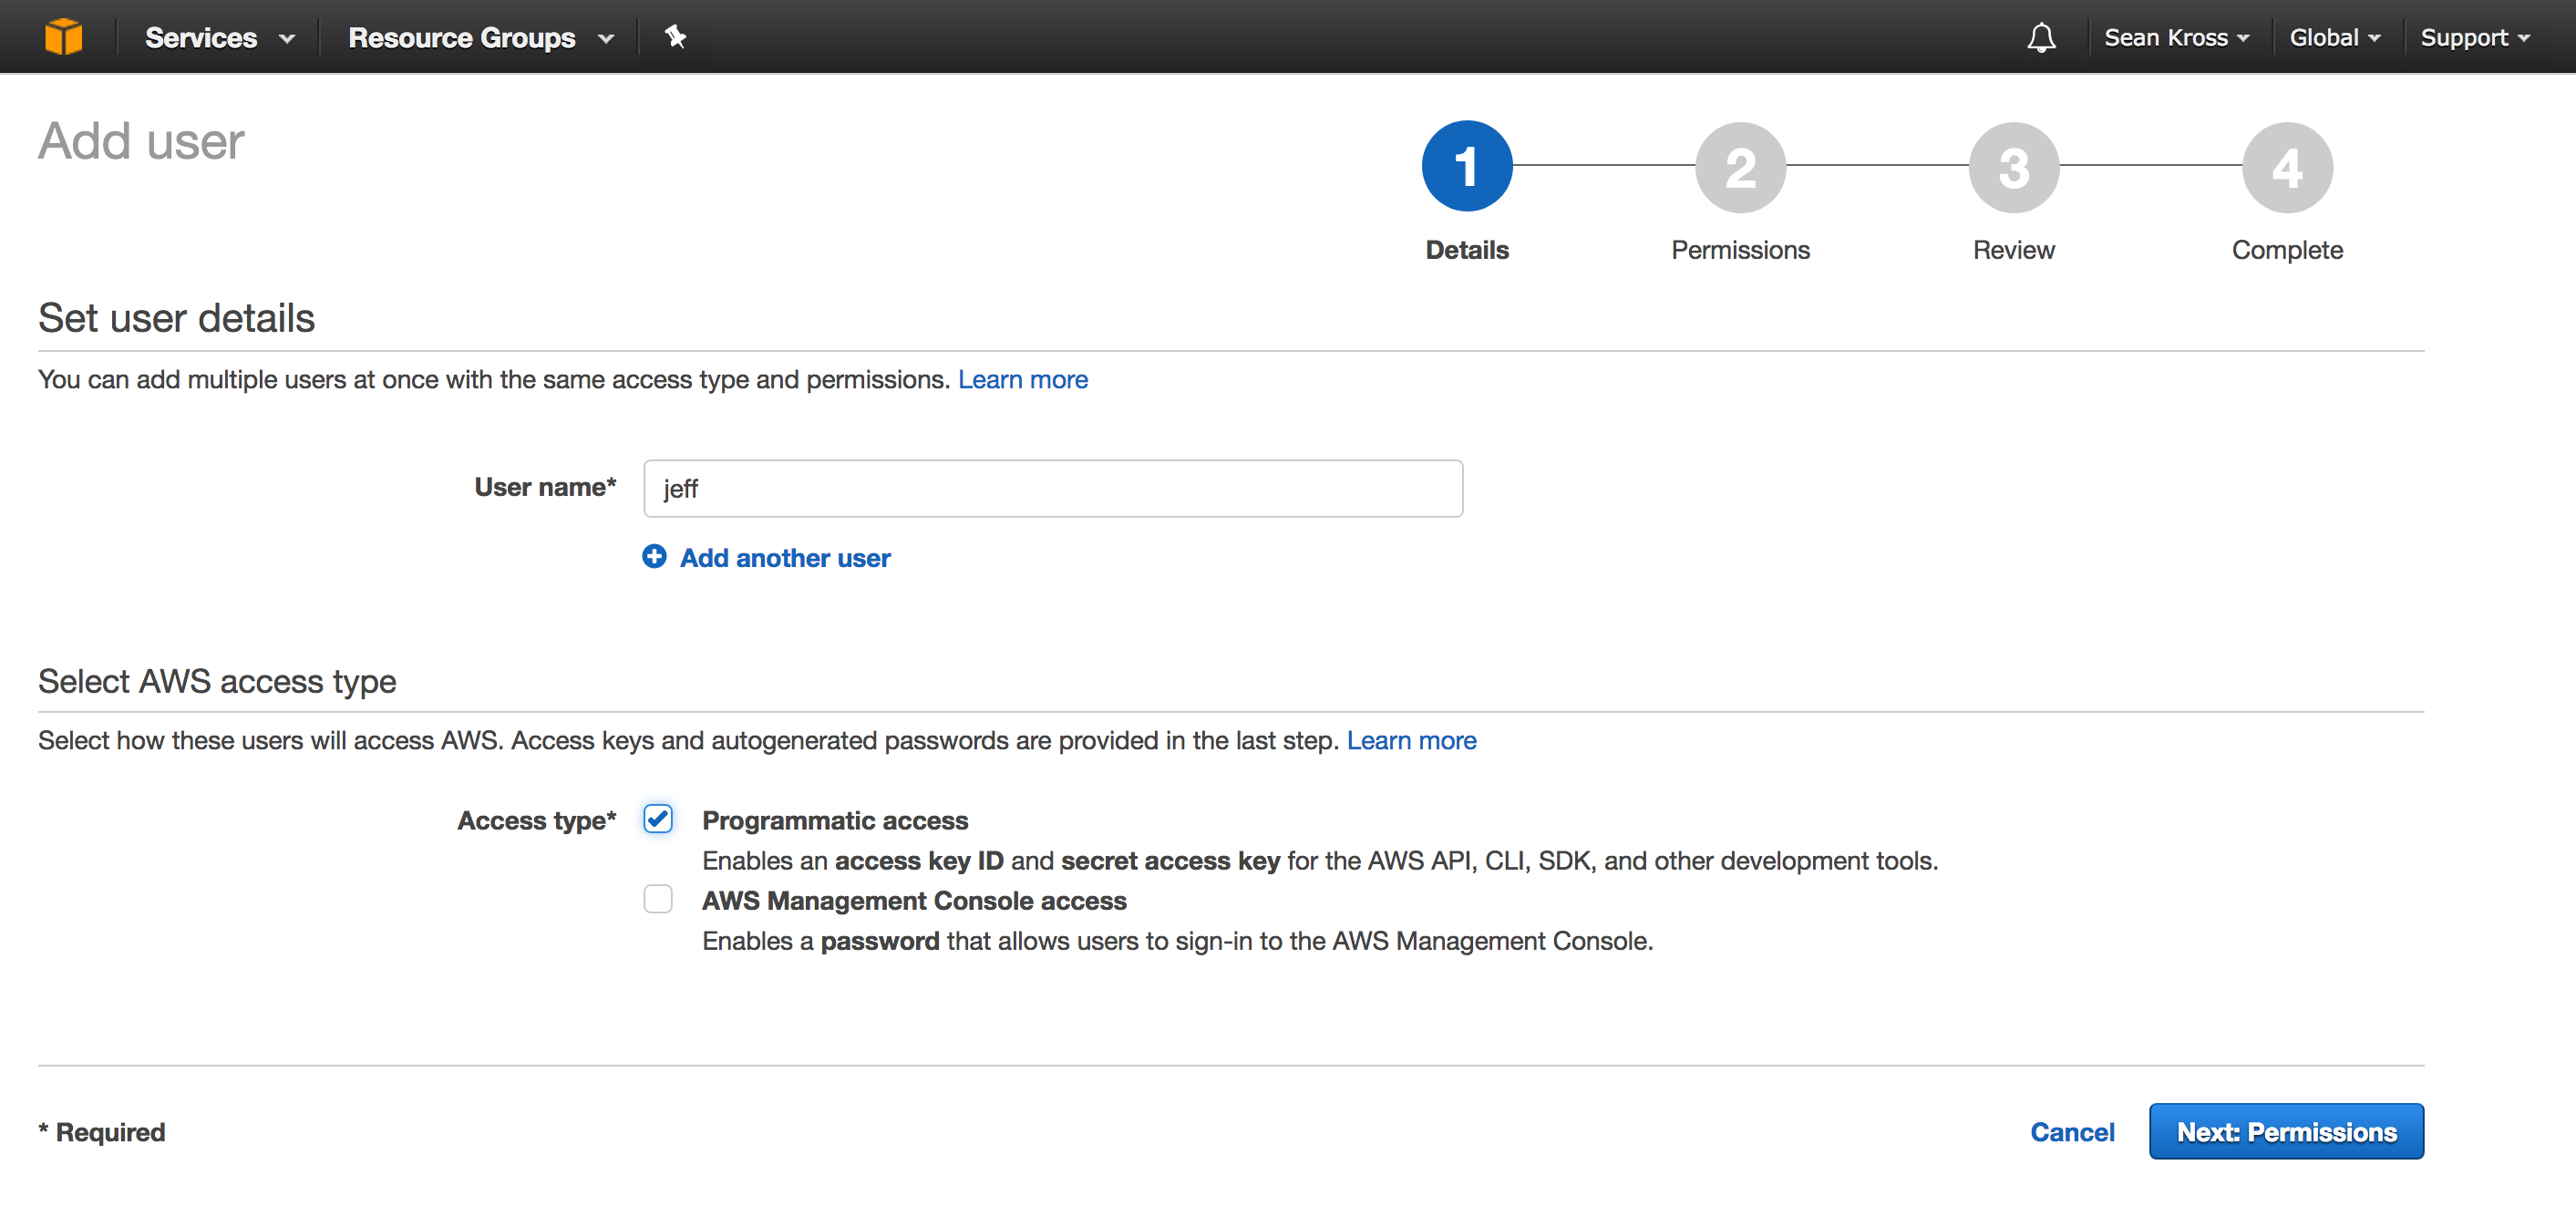
After you’ve checked the box, you can click Next: Permissions, then you should see the screen below.
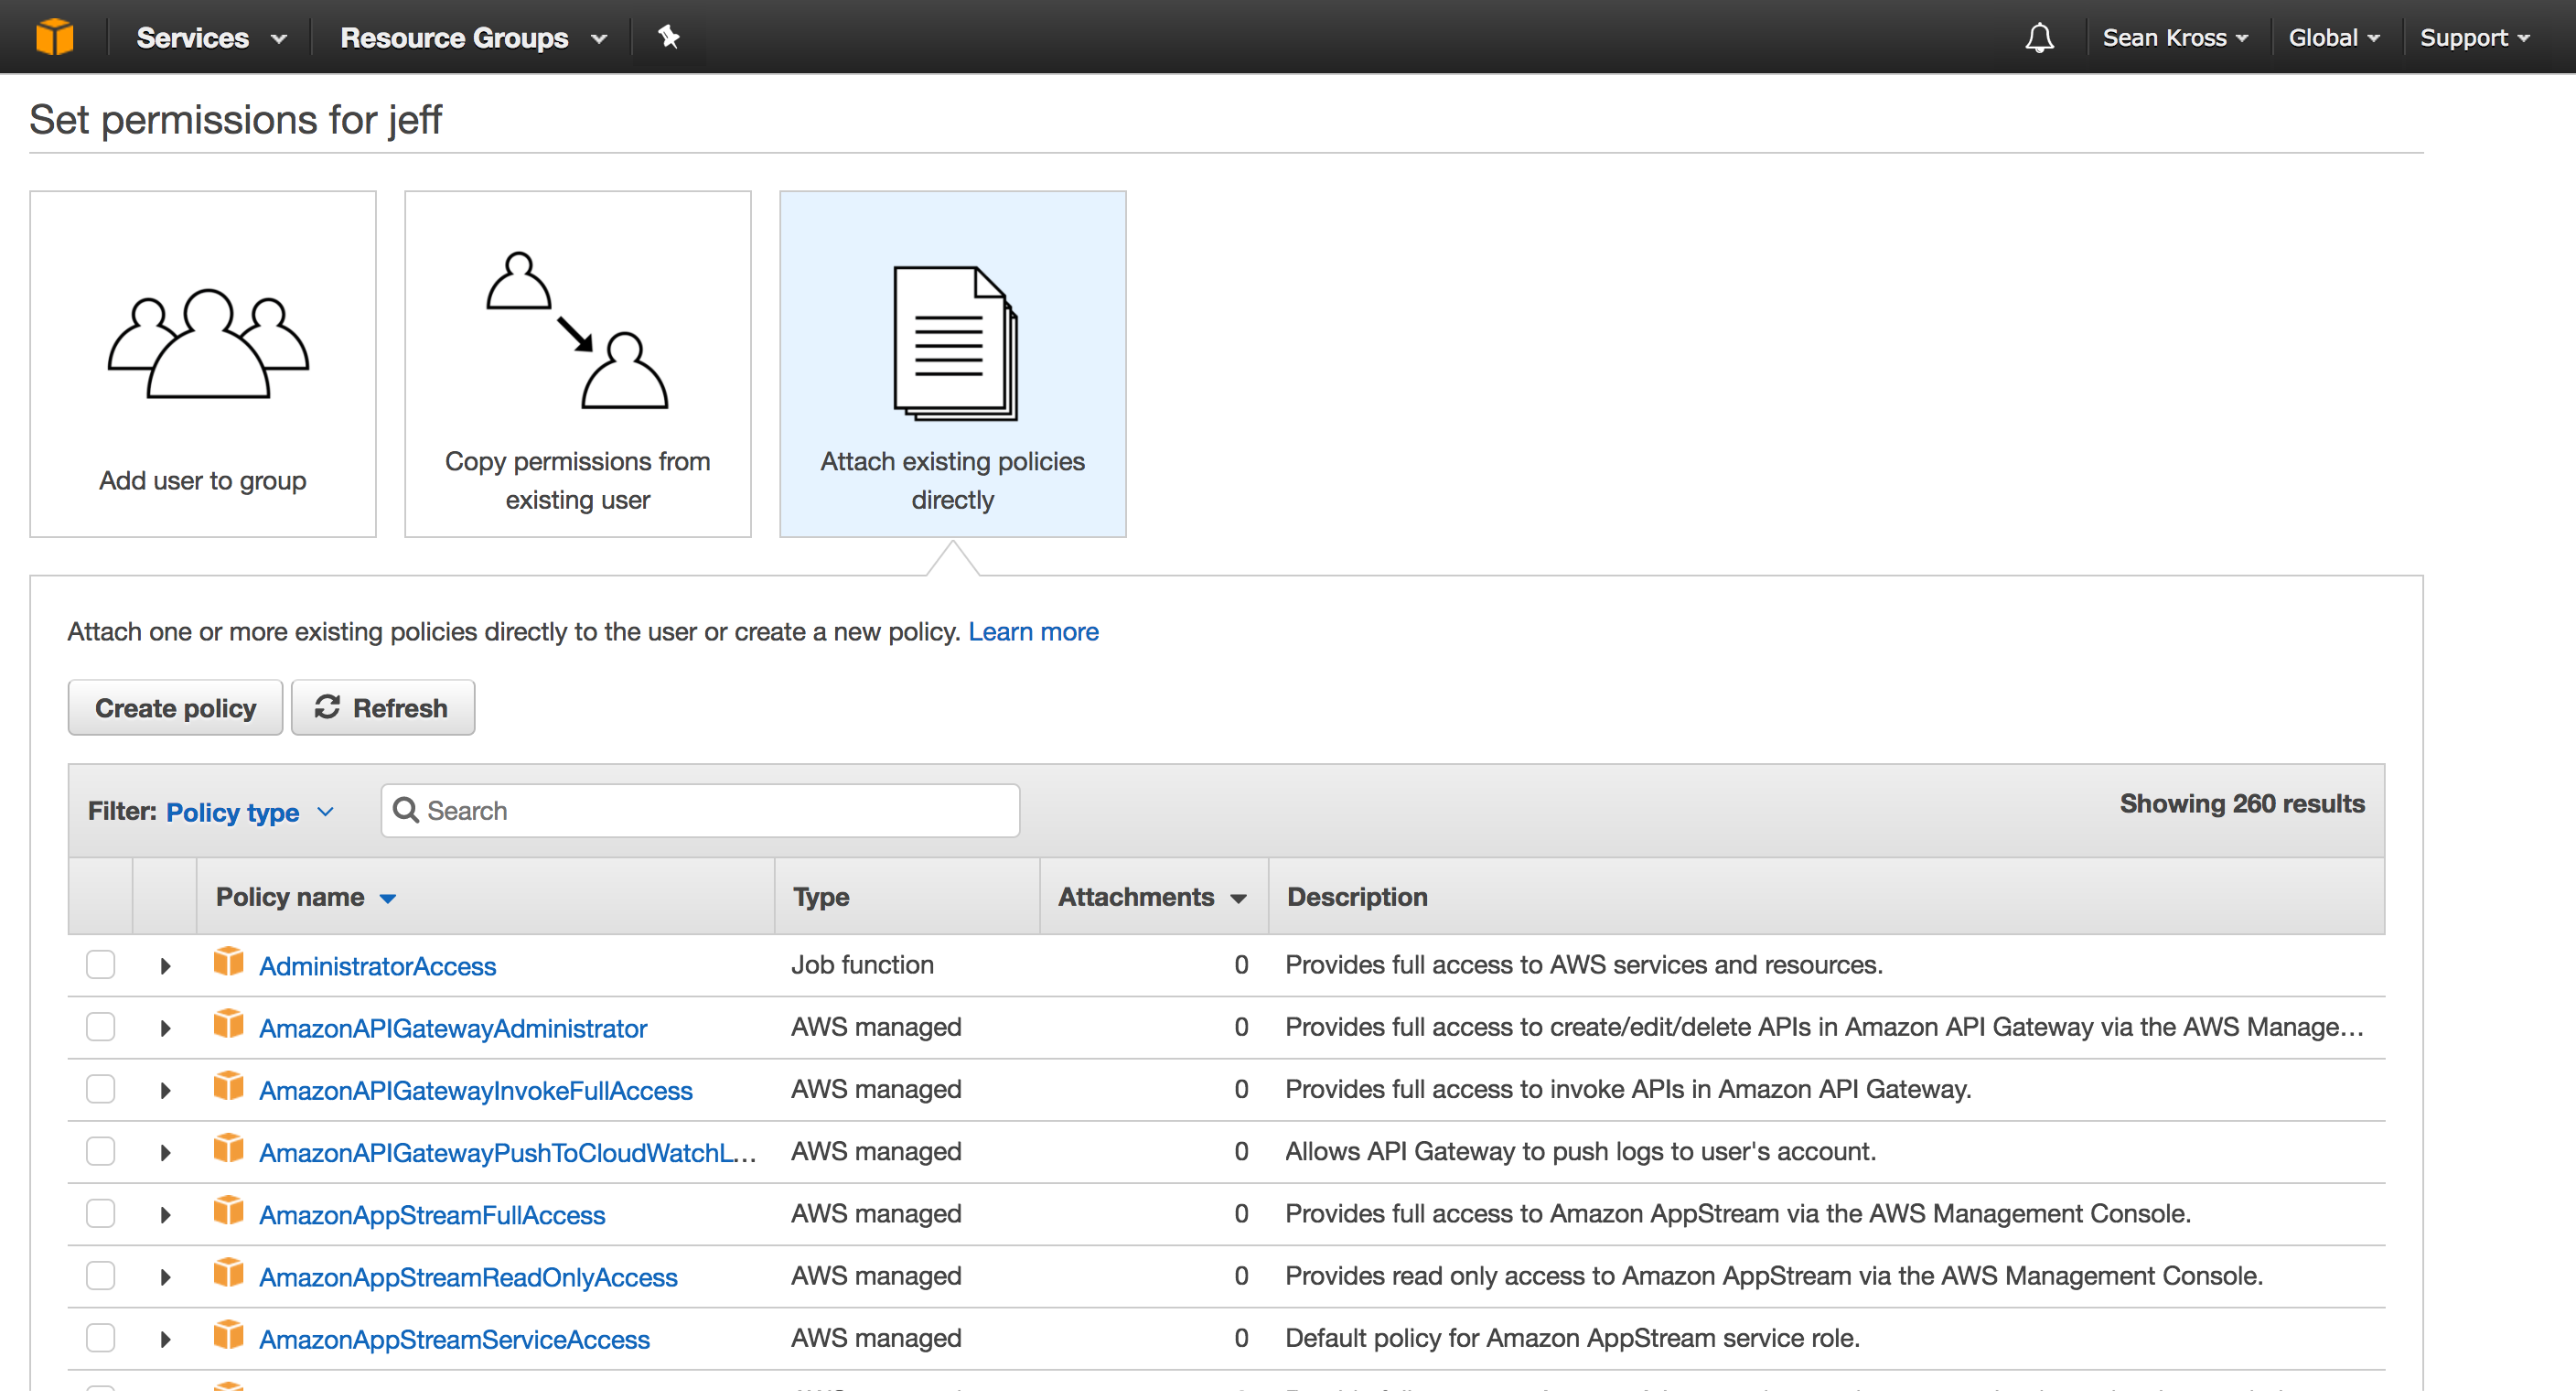
On this page you first need to select how you’re going to assign AWS permissions
to this user. Click Attach existing policies directly so that you can
specify which services you’re going to use. In this case, we’re going to take
the aws.s3 package for a spin, so type “s3” into the search bar in the middle
of the page:
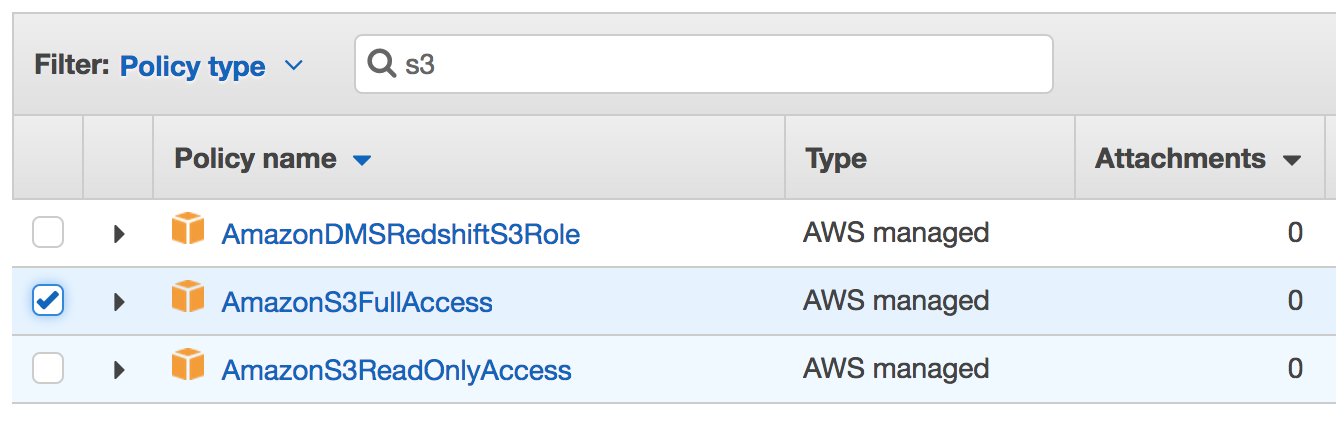
Amazon S3 is just a big hard drive that you can access over the internet (like a programmable Dropbox). Check the box next to AmazonS3FullAccess so that you can create and destroy files in Amazon S3. If you wanted to use a different web service, you could search for the name of that service here to provide even more access to this user. When you’re finished, click Next: Review. On the following screen click Create user in order to get your credentials. You should now see this screen:
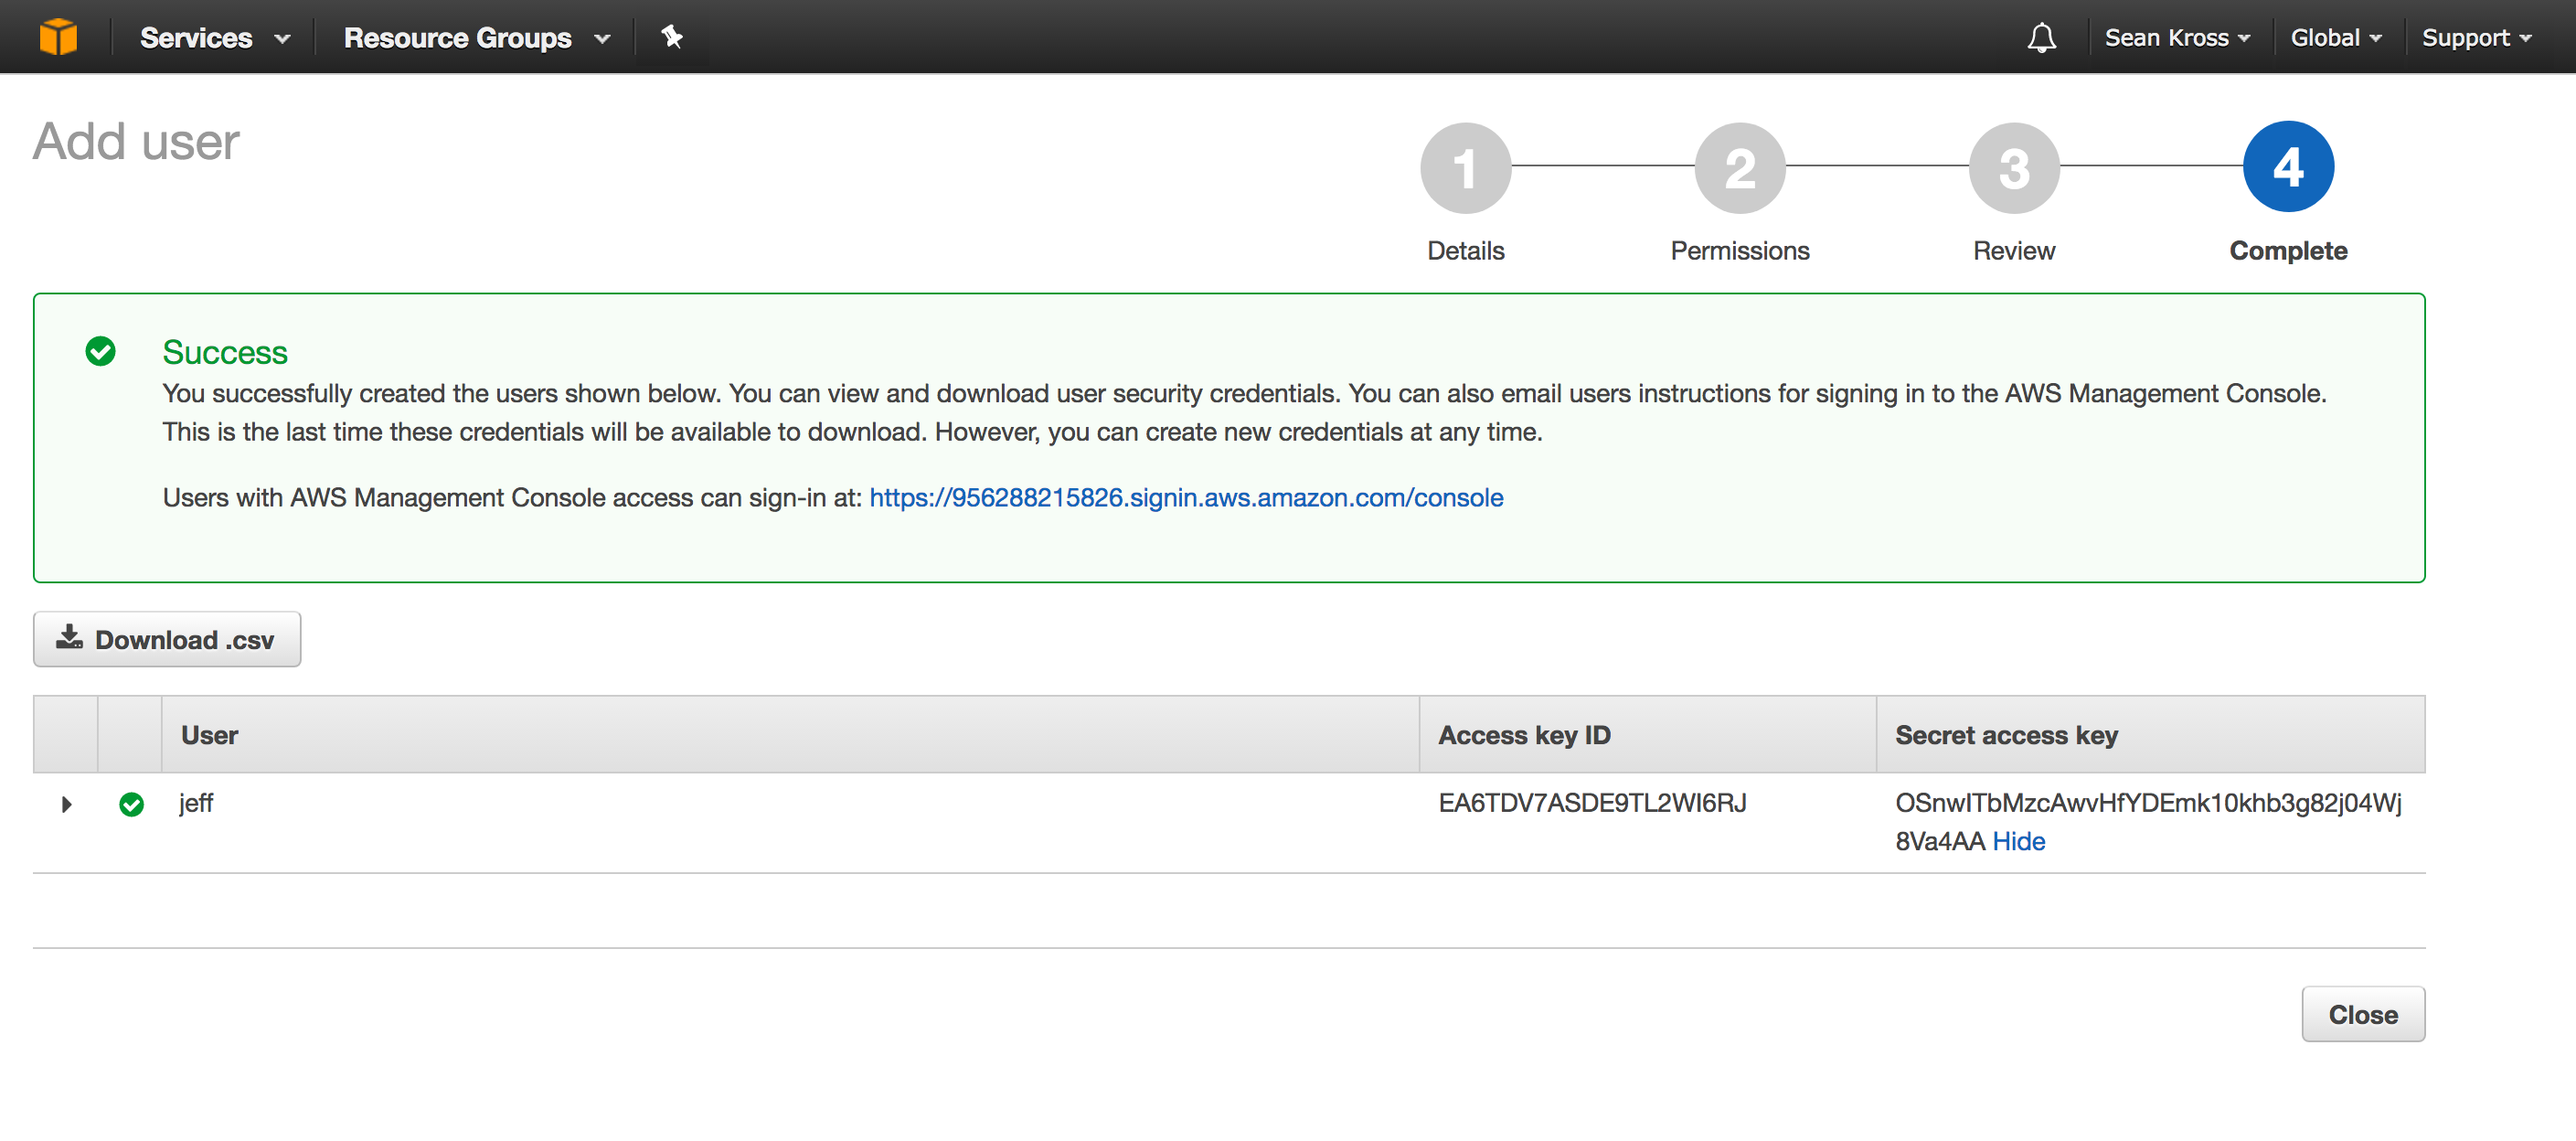
In order to use AWS in R you need two strings: the access key ID and the secret access key. Click show under the secret access key heading in order to see the secret access key. Copy and paste each key into a file for safe keeping. Never share these keys since anyone with them can use your AWS account (the keys in this screenshot are fake). After you leave this page you will never be able to retrieve the secret access key, so make sure you’ve recorded it. Don’t worry if you lose your secret access key though, you can just create a new user to get a new key. After you have both keys you can click the Close button. You’re now ready to start using AWS in R!
Now let’s test out our big cloud hard drive with the aws.s3 package which you
can install with install.packages("aws.s3"). To use the package you’ll need to
set up three environmental variables like I have below by specifying the
access key ID, and the secret access key which we just set up, plus the AWS
region which specifies the Amazon server farm geographically closest to you. You
can get a list of all regions
for all services here,
and you click here
to see which S3 regions are available. Load up the library and set up your keys
and region like so:
library(aws.s3)

# Set up your keys and your region here.
Sys.setenv("AWS_ACCESS_KEY_ID" = "EA6TDV7ASDE9TL2WI6RJ",
           "AWS_SECRET_ACCESS_KEY" = "OSnwITbMzcAwvHfYDEmk10khb3g82j04Wj8Va4AA",
           "AWS_DEFAULT_REGION" = "us-east-2")
Let’s create a fresh CSV file that we can store on Amazon’s servers:
# trees is a built-in data set. Let's create a new CSV file that we can upload
# to AWS S3.
write.csv(trees, "trees.csv", row.names = FALSE)
Now let’s upload this file to S3. Amazon organizes S3 into buckets, which
are like named cloud hard drives. You have to come up with a hard drive name
that nobody else has used before, so we’re going to introduce some randomness
to come up with a unique bucket name. The put_bucket() function creates the
bucket.
# Coming up with unique bucket names is tricky, so we'll add a random string
# to the name of this bucket.
bucket_name <- paste(c("blog-post-", sample(c(0:9, letters), size = 10, replace = TRUE)), collapse = "")

# Now we can create the bucket.
put_bucket(bucket_name)
Now we can put files in our bucket using put_object() by specifying which
bucket we want to use:
# Let's put our CSV file in the bucket.
put_object("trees.csv", bucket = bucket_name)
We can then pull files out of the bucket given the name of the file with the
save_object() function. Let’s make sure the file we pulled out of the bucket
is the same as the file we put in!
# We've put data in The Cloud! Now let's get it back on our computer:
save_object("trees.csv", bucket = bucket_name, file = "trees_s3.csv")

# Are the files the same?
trees_s3 <- read.csv("trees_s3.csv")
all.equal(trees, trees_s3)
## [1] TRUE
Looks like it works! Now let’s delete the hard drive we created since we won’t need to use it anymore.
# We're finished with this bucket, so let's delete it.
delete_bucket(bucket_name)
Amazon Web Services has a pretty generous free tier, so as long as you always clean up after yourself during these experiments like these you shouldn’t incur any charges. Have fun playing in the clouds!